
ピッキング
ピッキングとはユーザーがどのオブジェクトをクリックしたか、またはタッチしたかを把握するプロセスの事で、最も一般的なピッキングは「Raycaster」を使用してマウスカーソルの位置(2D)からシーンの錐台を通して光線を出してそれと交差した3Dオブジェクトを検出します
Raycasterとは
スクリーン座標(2Dの位置)を取得すると、Three.jsの Raycaster はカメラの視点を基点にして、その座標を通るような「レイ(光線)」を生成します
「レイ(光線)」はカメラから見たスクリーン上の任意のポイントからシーンの奥行き方向に向かって延びる仮想の「方向ベクトル」です
例えば、指定した方向に「光線(レイ)」を放つことで、そのレイが交差するオブジェクトを見つけることができる
*(注意)Raycasterは「透明な穴」を持つオブジェクトには対応できないため、透明部分でもヒットしてしまうことがあります
- Raycasterの生成
new THREE.Raycaster()でRaycasterオブジェクトを生成します - レイの方向と位置
set(origin, direction)メソッドを使って、レイを放つ位置と方向を設定します
origin: 光線の始点を表すTHREE.Vector3オブジェクト。
direction: 光線の方向を表すTHREE.Vector3オブジェクトで正規化する必要があり normalize() メソッドで行えます - レイ(光線)と交差するオブジェクトを見つけるために使用
intersectObject(object, recursive, target)は単一のオブジェクトと交差するかテストintersectObjects(objects(配列), recursive, target)はオブジェクトの配列と交差するかテスト
recursive (オプション): 再帰的にチェックする(子オブジェクトも検査する)場合は true
target (オプション):結果を格納するための配列。通常は指定不要 - 交差結果の解析
交差した場合の結果には、多くの有用な情報が含まれます
distance:レイの原点と交差点との距離
face:どの面が当たった。
faceIndex:その面のインデックス
object:どのオブジェクトが交差したか
point:交差した具体的な3D座標
uv:当たった面のUV座標
Raycasterはスクリーン座標(2D)を 3D 空間の方向ベクトルに変換できます
この方向はカメラの視点に基づいている
要するに、2Dクリック位置から3D空間での選択や操作を実現できます
マウスがのったオブジェクトだけ色をつける
マウスの位置を基にしたRaycasterの使い方
マウスの位置は「-1.0〜1.0」の割合で管理するための正規化して管理する
//マウスの位置を正規化してTHREE.Vector2で保持
const mousePositions = new THREE.Vector2();

window.addEventListener('mousemove', function(e) {
    //X軸: 画面幅に対して-1から1に正規化
    mousePosition.x = (e.clientX / window.innerWidth) * 2 - 1;
    //Y軸: 画面高さに対して-1から1に正規化(Y軸は逆方向)
    mousePosition.y = - (e.clientY / window.innerHeight) * 2 + 1;
});
正規化したマウスの位置を使ってRaycasterの方向をカメラとマウス座標に基づいて更新します
この更新はsetFromCamera()メソッドを使いますrayCaster.setFromCameraでカメラから画面上の特定の点に向かう光線を作成
const rayCaster = new THREE.Raycaster();
//カメラから画面上の特定の点に向かう光線を作成
rayCaster.setFromCamera(mousePosition, camera);
//光線とぶつかったオブジェクトの配列
const intersects = rayCaster.intersectObjects(scene.children);
if(intersects.length > 0){
//処理
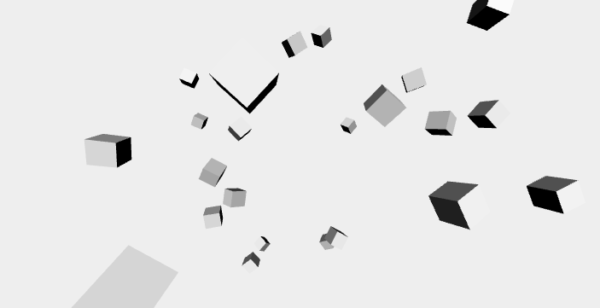
}アニメーションしている物体に対してキャストするにはRaycasterを毎フレーム更新します
const rayCaster = new THREE.Raycaster();
function animate() {
  //rayCaster
  rayCaster.setFromCamera(mousePosition, camera);
  const intersects = rayCaster.intersectObjects(cubeList);
  cubeList.forEach((cube) => {
    if (intersects.length > 0 && cube === intersects[0].object) {
      cube.material.color.set(0xff0000);
    } else {
      cube.material.color.set(0xffffff);
    }
  });
  renderer.render(scene, camera);
}
マウスが乗ったオブジェクトの色を変える
メモ(余談):便利なユーティリティ関数
function rand(min, max) {
  if (max === undefined) {
    max = min;
    min = 0;
  }
  return min + (max - min) * Math.random();
}
function randomColor() {
  return `hsl(${rand(360) | 0}, ${rand(50, 100) | 0}%, 50%)`;
}
カメラの向きと平行の面に描画する
法線と点で平面を作成するにはTHREE.PlaneのsetFromNormalAndCoplanarPointメソッドを使います
normal:法線を表す3次元ベクトル
point:原点を表す3次元ベクトル
例では原点を通りY軸に平行な平面を定義しPlaneオブジェクトにセットします
const normal = new THREE.Vector3(0, 1, 0);
const point = new THREE.Vector3(0, 0, 0);
const plane = new THREE.Plane().setFromNormalAndCoplanarPoint(normal, point);ちなみに法線とは3次元空間において、ある平面上の垂直な方向を表すベクトルのこと
*一般的には平面上で上向きを表すベクトルが法線となります
raycaster.setFromCameraでカメラからマウス座標に向かう光線を作成raycaster.ray.intersectPlaneは平面とレイの交差点を計算、結果をTHREE.Vector3オブジェクトとして返します
const raycaster = new THREE.Raycaster();
const mouse = new THREE.Vector2();
const camera = new THREE.PerspectiveCamera(45, window.innerWidth / window.innerHeight, 1, 1000);
const plane = new THREE.Plane(new THREE.Vector3(0, 1, 0), 0);
const point = new THREE.Vector3();

function onMouseMove(event) {
    mouse.x = (event.clientX / window.innerWidth) * 2 - 1;
    mouse.y = -(event.clientY / window.innerHeight) * 2 + 1;
}
function render() {
    raycaster.setFromCamera(mouse, camera);
    if (raycaster.ray.intersectPlane(plane, point)) {
        console.log(point);
    }
    renderer.render(scene, camera);
}
window.addEventListener('mousemove', onMouseMove, false);キャンバスを透明にする
WebGLRenderer作成時に「alpha:true」を指定
*マテリアルもopacityを付けることができる
const renderer = new THREE.WebGLRenderer({
canvas,
alpha: true,
// premultipliedAlpha: false,
});
//マテリアル
const material = new THREE.MeshPhongMaterial({
color,
opacity: 0.5,
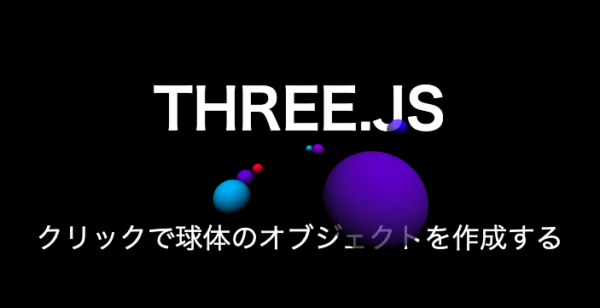
});クリックでカメラの向きと平行の面に球体のオブジェクトを描画します
*透明のキャンバスを上に重ねている
大量のオブジェクトの最適化について
ジオメトリとマテリアルの共有
大量のオブジェクト(3000個のキューブ)
最適化していないコードの例
//ループ内でジオメトリとマテリアルを毎回新しく作成するアプローチ
//これはNG ループ内でジオメトリとマテリアルを毎回新しく作成するアプローチ
for (let i = 0; i < 3000; i++) {
  const geometry = new THREE.BoxGeometry(1, 1, 1);
  const material = new THREE.MeshNormalMaterial();
  const cube = new THREE.Mesh(geometry, material);
  scene.add(cube);

  const x = 200 * (Math.random() - 0.5);
  const y = 200 * (Math.random() - 0.5);
  const z = 200 * (Math.random() - 0.5);

  cube.position.set(x, y, z);
}特に大量のオブジェクトをレンダリングする場合する場合、ジオメトリとマテリアルを共有することでことで、メモリの使用量を削減し、レンダリング速度を向上させることが可能です
const geometry = new THREE.BoxGeometry(1, 1, 1);
const material = new THREE.MeshNormalMaterial();

function makeInstance(geometry, material, x, y, z) {
  const cube = new THREE.Mesh(geometry, material);
  scene.add(cube);
  cube.position.set(x, y, z);
  return cube;
}

for (let i = 0; i < 3000; i++) {
  const x = 200 * (Math.random() - 0.5);
  const y = 200 * (Math.random() - 0.5);
  const z = 200 * (Math.random() - 0.5);
  makeInstance(geometry, material, x, y, z);
}
BufferGeometry
2024年1月追記
以前は、Geometryは複数の属性を持つオブジェクトを使用してジオメトリを、BufferGeometryは、より効率的な配列バッファを使用してジオメトリの属性を保持していました
しかし、Three.jsのバージョン0.125以降では、Geometryを使っても、内部的にはBufferGeometryとして扱われ、BufferGeometryを直接使用した場合と同様のパフォーマンスが期待できます
*頂点の動きが必要な場合は、GPU上で直接計算を行う頂点シェーダーの使用が推奨されます
BufferGeometryはジオメトリの表現方法の一つで、通常のThree.jsのジオメトリと異なり、単一の配列バッファを使用してジオメトリ属性(BufferAttribute)を保持します
BufferGeometryは大量のオブジェクトを描画する際に、パフォーマンスが向上します
ジオメトリ属性について
*ジオメトリ属性はGeometryオブジェクトのプロパティとして定義されておりBufferGeometryを使用することもできます
position:頂点の位置を表す3次元ベクトル
これは必須の属性で頂点の位置情報を持つ必要がありますnormal:頂点の法線を表す3次元ベクトル
照明の影響を受けたり、法線マップを使用する場合に必要な属性です
*ライトに反応するマテリアルを利用するの場合はnormalも必要color:頂点の色を表す3次元ベクトル
頂点の色情報を持つ必要がある場合に使用します
*三角形の3つの頂点で異なるRGB色を持っている(多分^^;)uv:頂点のテクスチャ座標を表す2次元ベクトル
テクスチャマッピングを使用する場合に必要な属性ですindex:頂点のインデックスを表す整数
頂点のインデックス情報を持つ必要がある場合に使用します。
1、データ(配列を作る)
例:1つの立方体の頂点情報
備考:三角形メッシュを作成する場合は重なっている頂点情報は不要で、代わりにインデックス属性を指定します
// 頂点情報を格納する配列
const vertices = [
  // front
  { pos: [-1, -1,  1],norm: [ 0,  0,  1]},
  { pos: [ 1, -1,  1],norm: [ 0,  0,  1]},
  { pos: [-1,  1,  1],norm: [ 0,  0,  1]},
  { pos: [-1,  1,  1],norm: [ 0,  0,  1]},
  { pos: [ 1, -1,  1],norm: [ 0,  0,  1]},
  { pos: [ 1,  1,  1],norm: [ 0,  0,  1]},
  // right
  { pos: [ 1, -1,  1], norm: [ 1,  0,  0]},
  { pos: [ 1, -1, -1], norm: [ 1,  0,  0]},
  { pos: [ 1,  1,  1], norm: [ 1,  0,  0]},
  { pos: [ 1,  1,  1], norm: [ 1,  0,  0]},
  { pos: [ 1, -1, -1], norm: [ 1,  0,  0]},
  { pos: [ 1,  1, -1], norm: [ 1,  0,  0]},
  // back
  { pos: [ 1, -1, -1], norm: [ 0,  0, -1]},
  { pos: [-1, -1, -1], norm: [ 0,  0, -1]},
  { pos: [ 1,  1, -1], norm: [ 0,  0, -1]},
  { pos: [ 1,  1, -1], norm: [ 0,  0, -1]},
  { pos: [-1, -1, -1], norm: [ 0,  0, -1]},
  { pos: [-1,  1, -1], norm: [ 0,  0, -1]},
  // left
  { pos: [-1, -1, -1], norm: [-1,  0,  0]},
  { pos: [-1, -1,  1], norm: [-1,  0,  0]},
  { pos: [-1,  1, -1], norm: [-1,  0,  0]},
  { pos: [-1,  1, -1], norm: [-1,  0,  0]},
  { pos: [-1, -1,  1], norm: [-1,  0,  0]},
  { pos: [-1,  1,  1], norm: [-1,  0,  0]},
  // top
  { pos: [ 1,  1, -1], norm: [ 0,  1,  0]},
  { pos: [-1,  1, -1], norm: [ 0,  1,  0]},
  { pos: [ 1,  1,  1], norm: [ 0,  1,  0]},
  { pos: [ 1,  1,  1], norm: [ 0,  1,  0]},
  { pos: [-1,  1, -1], norm: [ 0,  1,  0]},
  { pos: [-1,  1,  1], norm: [ 0,  1,  0]},
  // bottom
  { pos: [ 1, -1,  1], norm: [ 0, -1,  0]},
  { pos: [-1, -1,  1], norm: [ 0, -1,  0]},
  { pos: [ 1, -1, -1], norm: [ 0, -1,  0]},
  { pos: [ 1, -1, -1], norm: [ 0, -1,  0]},
  { pos: [-1, -1,  1], norm: [ 0, -1,  0]},
  { pos: [-1, -1, -1], norm: [ 0, -1,  0]},
];
2、BufferGeometryオブジェクトのインスタンスを作成
3、ジオメトリ属性を指定するsetAttribute (名前, BufferAttribute)
*名前はthree.jsで決められている名前を指定する
*BufferAttributeに浮動小数点数や整数値などのデータを格納します
具体的にはFloat32Array・Uint16Array・Int8ArrayなどのTypedArrayを使用してデータを格納
*BufferAttributeはネイティブ配列ではなくTypedArrayである必要がある
const geometry = new THREE.BufferGeometry();
//positions, normalsの2つの配列を並列の配列として扱う
const positions = [];
const normals = [];
for (const vertex of vertices) {
  positions.push(...vertex.pos);
  normals.push(...vertex.norm);
}
const geometry = new THREE.BufferGeometry();
geometry.setAttribute(
  'position',
  new THREE.BufferAttribute(new Int8Array(positions), 3)
);
geometry.setAttribute(
  'normal',
  new THREE.BufferAttribute(new Int8Array(normals), 3)
);
4、MeshオブジェクトにBufferGeometryオブジェクトとMaterialオブジェクトを設定する。
//3000の立方体
for (let i = 0; i < 3000; i++) {
const x = 200 * (Math.random() - 0.5);
const y = 200 * (Math.random() - 0.5);
const z = 200 * (Math.random() - 0.5);
makeInstance(geometry, x, y, z)
}
//Meshオブジェクトを作成する関数
function makeInstance(geometry, x, y, z) {
const material = new THREE.MeshLambertMaterial({ color: 0xff00ff });
const cube = new THREE.Mesh(geometry, material);
scene.add(cube);
cube.position.set(x,y,z);
return cube;
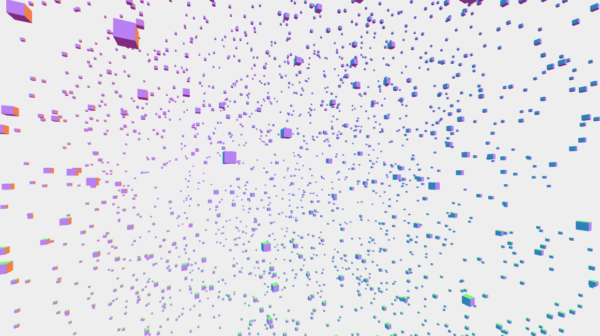
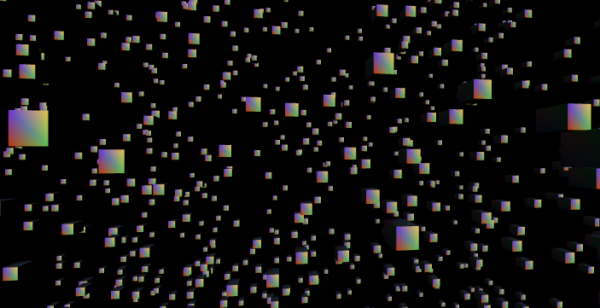
}3000個の立方体をBufferGeometryで描画
BufferAttributeのcolorを追加して、マテリアルで頂点カラー(vertexColors)を設定
ジオメトリのマージ
THREE.BufferGeometryUtils.mergeBufferGeometriesメソッドで複数のジオメトリを結合して単一のジオメトリにマージできます
単一のオブジェクトとしてレンダリングすることができ、パフォーマンスが向上します
このメソッドはThree.js本体のコードに含まれていません
examples/js/utilsフォルダ
three@../examples/js/utils/BufferGeometryUtils.jsconst geometries = [];
for (let i = 0; i < 10; i++) {
//BoxGeometryで立方体を作成
const boxGeometry = new THREE.BoxGeometry(1, 1, 1);
//BufferGeometryオブジェクトに変換
const geometry = new THREE.BufferGeometry().fromGeometry(boxGeometry);
// 各BufferGeometryオブジェクトの位置を設定
geometry.translate(Math.random() * 10 - 5, Math.random() * 10 - 5, Math.random() * 10 - 5);
geometries.push(geometry);
}
// 配列内のBufferGeometryオブジェクトを結合する
const mergedGeometry = THREE.BufferGeometryUtils.mergeBufferGeometries(geometries);
// 結合したGeometryオブジェクトを使用してMeshオブジェクトを作成し、シーンに追加する
const material = new THREE.MeshBasicMaterial({color: 0xff0000});
const mesh = new THREE.Mesh(mergedGeometry, material);
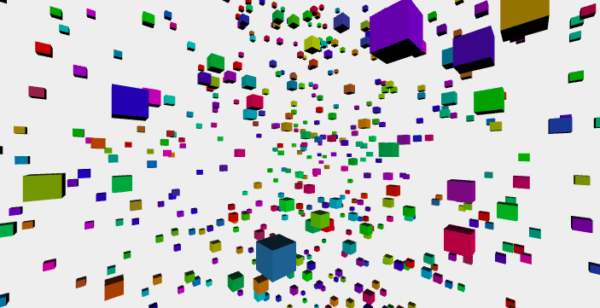
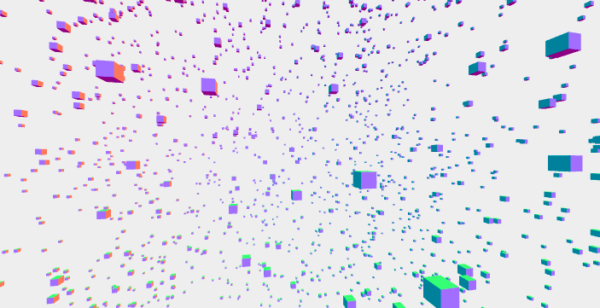
scene.add(mesh);3000個の立方体を1つのジオメトリとして描画
THREE.Points
THREE.Pointsは、大量の3D点を効率的にレンダリングする際に利用します
THREE.Meshの代わりにTHREE.Points(3D空間内の点群を表現)を使う
THREE.Points クラスを使用する場合頂点データのみを描画するので、計算負荷は低く、数が多くなっても高いフレームレートで描画が可能
*ちなみにマテリアルはTHREE.PointsMaterialという独自のマテリアルになる
// カスタムジオメトリを作成
const particlesGeometry = new THREE.BufferGeometry();
const count = 5000;
//それぞれにx, y, zの座標が必要なのでcount * 3
const positions = new Float32Array(count * 3);
const colors = new Float32Array(count * 3); // 色データ用の配列を作成

for(let i = 0; i < count * 3; i++) {
    positions[i] = (Math.random() - 0.5) * 10;
   // 各パーティクルにランダムな色を設定
    colors[i] = Math.random();
  }

 particlesGeometry.setAttribute('position', new THREE.BufferAttribute(positions, 3));
 particlesGeometry.setAttribute('color', new THREE.BufferAttribute(colors, 3)); // 色データをgeometryに設定

// マテリアルを作成
 const particlesMaterial = new THREE.PointsMaterial({
   size: 0.1, //パーティクルのサイズ
   sizeAttenuation: true, //遠くのパーティクルを小さく表示する
   vertexColors: true // 頂点カラーを有効にする
  });

// パーティクルを作成
 const particles = new THREE.Points(particlesGeometry, particlesMaterial);

// パーティクルをシーンに追加
 scene.add(particles);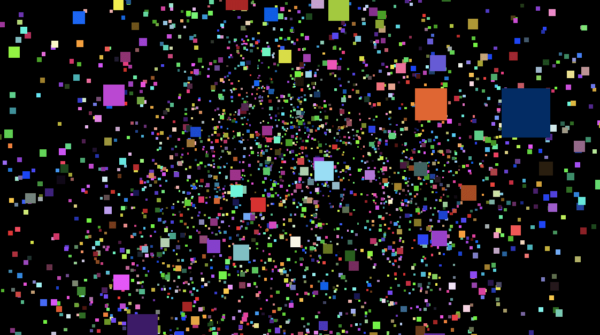
PointsMaterialのプロパティ
- color: ポイントの色を設定します。
例: 0xFFFFFF は白色。 - vertexColors: 頂点カラーをマテリアルに適用するかどうかを設定します。
例: THREE.NoColors, THREE.FaceColors, THREE.VertexColors
ポイントごとに異なる色を適用したい場合や、頂点カラーで色の補間を行いたい場合に使用します。 - size: ポイントのサイズを設定します。
例: 5 は5ユニットの大きさ。
ポイントの大きさを調整する際に使用します。 - sizeAttenuation: サイズの減衰を制御します。
例: true または false
カメラからの距離に応じてポイントのサイズを変更するかどうかを設定します。 - map: テクスチャマップを適用します。
例: THREE.Texture オブジェクト。
ポイントにテクスチャを適用する場合に使用します。
alphaMap: アルファ(透明度)マップを適用します。
例: THREE.Texture オブジェクト。
ポイントの透明度をテクスチャに基づいて制御する場合に使用します。 - transparent: マテリアルが透明かどうかを設定します。
例: true または false
ポイントが透明であるか半透明であるかを制御する場合に使用します。 - alphaTest: 透明度のしきい値を設定します。
例: 0.5
この値より低い透明度を持つピクセルは、描画されません。アルファブレンディングに影響を与え、パフォーマンスの向上が期待できます。 - depthTest: 深度テスト(Zテスト)を有効または無効にします
trueの場合、、カメラに近いピクセルが優先的に描画され、カメラから遠いピクセル(手前のオブジェクトに隠れているピクセル)は描画されない - depthWrite: 深度バッファへの書き込みを制御します(true または false)。
*深度バッファとは、3Dシーンを描画する際に各ピクセルのカメラからの距離(深度)を記録するためのバッファです- depthWrite: true: 各ピクセルのカメラからの距離(深度)を深度バッファに書き込む設定です。これにより、手前にあるピクセルが奥にあるピクセルを正しく隠し、オブジェクト同士の描画順序を維持します
通常、不透明なオブジェクトに使用される - depthWrite: false: 透明なオブジェクト(transparent: true)の場合は、深度バッファに書き込むと透明な部分を通して後ろのオブジェクトが正しく見えなくなる可能性があるため、深度バッファへの書き込みは通常しません
これにより、透明部分を通して後ろのオブジェクトが見えるように描画できる
- depthWrite: true: 各ピクセルのカメラからの距離(深度)を深度バッファに書き込む設定です。これにより、手前にあるピクセルが奥にあるピクセルを正しく隠し、オブジェクト同士の描画順序を維持します
- blending: ブレンディングモードを設定します。
例: THREE.NormalBlending, THREE.AdditiveBlending など。
ピクセルの色がどのようにブレンドされるかを制御します。例えば、加算ブレンディングは光のような効果を作り出します。
*備考:THREE.Line(3D空間内の直線を表現)とTHREE.LineBasicMaterial