THREE.Pointsを対象にシェーダーを適用する
*各パーティクルはカメラに面した平面で構成されている
*パーティクルではRaycasterは機能しない
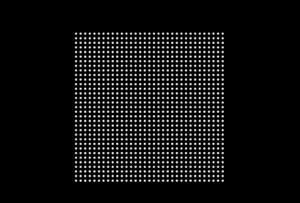
平面上のパーティクル(PlaneGeometry)
セットアップ
<canvas class="webgl"></canvas>.webgl {
position: fixed;
top: 0;
left: 0;
outline: none;
box-sizing: border-box;
}import './effect6.css'
import * as THREE from 'three'
import vertexShader from './vertex.glsl'
import fragmentShader from './fragment.glsl'
import { OrbitControls } from 'three/examples/jsm/controls/OrbitControls.js'
const canvas = document.querySelector('.webgl')
/*
pixelRatioとresolutionは、
高解像度ディスプレイに対応し、
パーティクルのサイズを画面の縦方向のサイズに比例させるために利用
*/
const sizes = {
width: window.innerWidth,
height: window.innerHeight,
pixelRatio : Math.min(window.devicePixelRatio, 2)// デバイスのピクセル比を取得し、最大でも2に制限
}
// 解像度を考慮したサイズを設定
sizes.resolution = new THREE.Vector2(sizes.width*sizes.pixelRatio, sizes.height*sizes.pixelRatio)
// シーンを作成
const scene = new THREE.Scene()
// WebGLレンダラーを作成し、サイズとピクセル比を設定
const renderer = new THREE.WebGLRenderer({
canvas: canvas
})
renderer.setSize(sizes.width, sizes.height)
renderer.setPixelRatio(sizes.pixelRatio)
// カメラ
const camera = new THREE.PerspectiveCamera(75, sizes.width / sizes.height, 0.1, 100)
camera.position.set(0, 0, 1)
scene.add(camera)
// オービットコントロール
const controls = new OrbitControls(camera, canvas)
controls.enableDamping = true
//ジオメトリ
const geometry = new THREE.PlaneGeometry(1, 1, 32, 32)
//マテリアル
const material = new THREE.ShaderMaterial({
vertexShader: vertexShader,
fragmentShader: fragmentShader,
uniforms: {
uResolution: { value: sizes.resolution },
}
})
const particles = new THREE.Points(geometry, material)
scene.add(particles)
function handleResize(){
sizes.width = window.innerWidth
sizes.height = window.innerHeight
sizes.pixelRatio = Math.min(window.devicePixelRatio, 2)
sizes.resolution.set(sizes.width*sizes.pixelRatio, sizes.height*sizes.pixelRatio)
camera.aspect = sizes.width / sizes.height
camera.updateProjectionMatrix()
renderer.setSize(sizes.width, sizes.height)
renderer.setPixelRatio(sizes.pixelRatio)
}
const tick = () =>{
controls.update()
renderer.render(scene, camera)
window.requestAnimationFrame(tick)
}
handleResize()
tick()
window.addEventListener('resize', handleResize)uniform vec2 uResolution;
void main(){
vec4 modelPosition = modelMatrix * vec4(position, 1.0);
vec4 viewPosition = viewMatrix * modelPosition;
vec4 projectedPosition = projectionMatrix * viewPosition;
gl_Position = projectedPosition;
/*
パーティクルのサイズを画面の縦方向のサイズに比例させる
*/
gl_PointSize = 0.01 * uResolution.y;
/*
sizeAttenuation(カメラからの距離に応じてどのように変化するかを制御))の実装
*/
gl_PointSize *= (1.0 / - viewPosition.z);
}
void main(){
   /*
    gl_PointCoord
    フラグメントシェーダー内でのみ利用可能で
    レンダリングされる各ポイント(パーティクル)のフラグメントに対して、
    そのポイントの中での相対的な位置を(0,0)から(1,1)の範囲で表す
   */
    vec2 uv = gl_PointCoord;
    float d = length(uv - vec2(0.5));
   /*
     円形に描画
     discard:そのピクセルは描画しない
   */
    if(d > 0.5)
        discard;

    gl_FragColor = vec4(1.0 ,1.0, 1.0, 1.0);
}
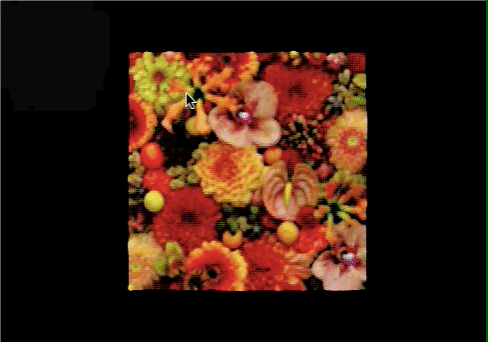
テクスチャをパーティクルで表現
テクスチャ(画像)の色をもとに、パーティクルの大きさを制御する
*ジオメトリのセグメント数より高い解像度のテクスチャは必要ない
const textureLoader = new THREE.TextureLoader()
const texture = textureLoader.load('./img.png')
//セグメント数128
const geometry = new THREE.PlaneGeometry(1, 1, 128, 128)
const material = new THREE.ShaderMaterial({
  //省略
    uniforms: {
        //省略
        uTexture: { value: texture },
    }
})
uniform vec2 uResolution;
uniform sampler2D uTexture;
varying vec3 vColor; // フラグメントシェーダーに色を渡す
void main() {
vec4 modelPosition = modelMatrix * vec4(position, 1.0);
vec4 viewPosition = viewMatrix * modelPosition;
vec4 projectedPosition = projectionMatrix * viewPosition;
gl_Position = projectedPosition;
// テクスチャの色を取得
vec4 textureColor = texture(uTexture, uv);
// RGBを平均して強度を取得
float intensity = length(textureColor.rgb) * 0.33;
// フラグメントシェーダーに色を渡す(グレースケールの場合は不要)
vColor = textureColor.rgb;
/*
グレースケールの場合は、RGBの1つの成分(例えば赤チャンネル)を使用すればよく
テクスチャの色の情報をフラグメントシェーダーに渡す必要はなく固定値で描画
float intensity = texture(uTexture, uv).r;
*/
gl_PointSize = 0.01 * intensity * uResolution.y;
gl_PointSize *= (1.0 / -viewPosition.z);
}varying vec3 vColor;
void main(){
vec2 uv = gl_PointCoord;
float d = length(uv - vec2(0.5));
if(d > 0.5)
discard;
// vColorを使ってパーティクルの色を設定
gl_FragColor = vec4(vColor, 1.0);
/*
グレースケールの場合、固定値で描画
gl_FragColor = vec4(1.0 ,1.0, 1.0, 1.0);
*/
}「canvas」を使って生成したデータをテクスチャにする
*new THREE.CanvasTexture()
//jsからキャンバスを作成する
const c = document.createElement('canvas');
//キャンバスの解像度(セグメント数以上は必要ない)
c.width = 128;
c.height = 128;
//デバック用にキャンバスを表示させるためのスタイル
// c.style.position = 'fixed';
// c.style.width = '300px';  // 表示サイズ
// c.style.height = '300px'; // 表示サイズ
// c.style.top = 0;
// c.style.left = 0;
// c.style.zIndex = 1001;
//document.body.append(c);

// コンテキスト取得
const ctx = c.getContext('2d');
// キャンバスの背景を塗りつぶす
ctx.fillStyle = 'black'; // 背景色
ctx.fillRect(0, 0, c.width, c.height);
// テキストを描画する
ctx.fillStyle = 'white'; // テキストの色
ctx.font = '20px Arial';
ctx.textAlign ='center';
ctx.textBaseline ='middle';
ctx.fillText('Canvas', c.width/2, c.height/2);

//省略
//canvasをテクスチャに
const texture = new THREE.CanvasTexture(c);
//細分化するセグメント数128
const geometry = new THREE.PlaneGeometry(1, 1, 128, 128)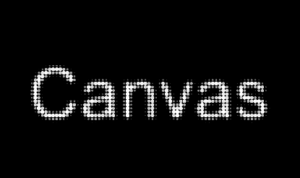
アニメーション
PlaneGeometry上のpointermoveイベントをRaycasterを使ってキャプチャし、その軌道を「canvas」に描画
const c = document.createElement('canvas');
c.width = 128;
c.height = 128;
// 必要であればデバック用に表示
c.style.position = 'fixed';
c.style.width = '300px';  // 表示サイズ
c.style.height = '300px';
c.style.top = 0;
c.style.left = 0;
c.style.zIndex = 1001;
document.body.append(c);

// コンテキスト取得
const ctx = c.getContext('2d');
const canvas = document.querySelector('.webgl')
const sizes = {
width: window.innerWidth,
height: window.innerHeight,
pixelRatio : Math.min(window.devicePixelRatio, 2)
}
sizes.resolution = new THREE.Vector2(sizes.width*sizes.pixelRatio, sizes.height*sizes.pixelRatio)
const scene = new THREE.Scene()
const renderer = new THREE.WebGLRenderer({
canvas: canvas,
alpha: true //canvasの背景をわかりやすくするため
})
renderer.setSize(sizes.width, sizes.height)
renderer.setPixelRatio(sizes.pixelRatio)
const camera = new THREE.PerspectiveCamera(75, sizes.width / sizes.height, 0.1, 100)
camera.position.set(0,0, 1)
scene.add(camera)
const controls = new OrbitControls(camera, canvas)
controls.enableDamping = true
// Raycasterを作成
const raycaster = new THREE.Raycaster();
const pointer = new THREE.Vector2(9999,9999); //デフォルトの座標
const canvasPointer = new THREE.Vector2(9999,9999)
// マウスの移動を検知
window.addEventListener('pointermove', (event) => {
// マウスのスクリーン座標を取得(-1~1の範囲)
pointer.x = (event.clientX / window.innerWidth) * 2 - 1;
pointer.y = -(event.clientY / window.innerHeight) * 2 + 1;
});
//キャプチャ用のPlaneGeometry
const plane = new THREE.Mesh(
new THREE.PlaneGeometry(1, 1),
new THREE.MeshBasicMaterial({color: 'red', side: THREE.DoubleSide })
)
scene.add(plane)
function handleResize(){
sizes.width = window.innerWidth
sizes.height = window.innerHeight
sizes.pixelRatio = Math.min(window.devicePixelRatio, 2)
sizes.resolution.set(sizes.width*sizes.pixelRatio, sizes.height*sizes.pixelRatio)
camera.aspect = sizes.width / sizes.height
camera.updateProjectionMatrix()
renderer.setSize(sizes.width, sizes.height)
renderer.setPixelRatio(sizes.pixelRatio)
}
const tick = () =>{
controls.update()
// カメラが動いたり、マウスが動くたびにレイキャストを更新
raycaster.setFromCamera(pointer, camera);
const intersects = raycaster.intersectObject(plane);
if (intersects.length > 0) {
// 交差しているオブジェクトがあれば処理を行う
const uv = intersects[0].uv; //交差点のUV座標を取得
// console.log(uv);
canvasPointer.x = uv.x * c.width
canvasPointer.y = (1-uv.y) * c.height
ctx.globalAlpha = 0.05 // 背景色を追加
ctx.fillStyle = 'black'; // 背景色を追加
ctx.fillRect(0, 0, c.width, c.height);
ctx.globalAlpha = 1
ctx.fillStyle = 'white';
ctx.fillRect(canvasPointer.x, canvasPointer.y, c.width/10, c.height/10);
} else{
ctx.globalAlpha = 0.05;
ctx.fillStyle = 'black';
ctx.fillRect(0, 0, c.width, c.height);
}
renderer.render(scene, camera)
window.requestAnimationFrame(tick)
}
handleResize()
tick()
window.addEventListener('resize', handleResize)
テクスチャ画像の色をもとに、パーティクルを表示
上の「canvas」のデータをテクスチャに利用して、そのパーティクルをアニメーションさせる
const c = document.createElement('canvas');
c.width = 128;
c.height = 128;
const ctx = c.getContext('2d');

const canvas = document.querySelector('.webgl')

//省略

const plane = new THREE.Mesh(
    new THREE.PlaneGeometry(1, 1),
    new THREE.MeshBasicMaterial({side: THREE.DoubleSide })
)
//重ねた平面は非表示に
plane.visible = false
//scene.add(plane)

//キャプチャを描画したcanvasをテクスチャに
const canvasTexture = new THREE.CanvasTexture(c);

//テクスチャ画像の色をもとに、パーティクルを表示
const textureLoader = new THREE.TextureLoader()
const texture = textureLoader.load('./img.png');
const geometry = new THREE.PlaneGeometry(1, 1, 128, 128)
geometry.setIndex(null)  //不要なデータ
geometry.deleteAttribute('normal') // 不要なデータ

const material = new THREE.ShaderMaterial({
    vertexShader: vertexShader,
    fragmentShader: fragmentShader,
    uniforms: {
        uResolution: { value: sizes.resolution },
        uTexture: { value: texture },
        uCanvasTexture: { value: canvasTexture },
    }
})
const particles = new THREE.Points(geometry, material)
scene.add(particles)

function handleResize(){
    sizes.width = window.innerWidth
    sizes.height = window.innerHeight
    sizes.pixelRatio = Math.min(window.devicePixelRatio, 2)
    sizes.resolution.set(sizes.width*sizes.pixelRatio, sizes.height*sizes.pixelRatio)
    camera.aspect = sizes.width / sizes.height
    camera.updateProjectionMatrix()
    renderer.setSize(sizes.width, sizes.height)
    renderer.setPixelRatio(sizes.pixelRatio)
}
const tick = () =>{
    controls.update()
    raycaster.setFromCamera(pointer, camera)
    const intersects = raycaster.intersectObject(plane)
    if (intersects.length > 0) {
         const uv = intersects[0].uv;
         canvasPointer.x = uv.x * c.width
         canvasPointer.y = (1-uv.y) * c.height
         ctx.globalAlpha = 0.05
         ctx.fillStyle = 'black'
         ctx.fillRect(0, 0, c.width, c.height)
         ctx.globalAlpha = 1
         ctx.fillStyle = 'white'
         ctx.fillRect(canvasPointer.x, canvasPointer.y, c.width/10, c.height/10)
    } else{
        ctx.globalAlpha =  0.05
        ctx.fillStyle = 'black'
        ctx.fillRect(0, 0, c.width, c.height)
    }
    //キャンバスを更新した後はテクスチャを更新する必要がある
    canvasTexture.needsUpdate = true
    renderer.render(scene, camera)
    window.requestAnimationFrame(tick)
}
handleResize()
tick()
window.addEventListener('resize', handleResize)
uniform vec2 uResolution;
uniform sampler2D uTexture;
uniform sampler2D uCanvasTexture;
varying vec3 vColor; // フラグメントシェーダーに色を渡す
void main() {
vec3 newPosition = position;
//キャンバステクスチャの強度を取得
float i = texture(uCanvasTexture, uv).r ;
i *= 0.2;
//z軸に対して頂点を動かす
vec3 pos = vec3(
0.0,
0.0,
1.0
);
pos *= i;
newPosition += pos;
vec4 modelPosition = modelMatrix * vec4(newPosition, 1.0);
vec4 viewPosition = viewMatrix * modelPosition;
vec4 projectedPosition = projectionMatrix * viewPosition;
gl_Position = projectedPosition;
// 画像テクスチャの色を取得
vec4 textureColor = texture(uTexture, uv);
// 画像テクスチャのRGBを利用して強度を取得
float intensity = length(textureColor.rgb) * 0.33;
vColor = textureColor.rgb;
gl_PointSize = 0.01 * intensity * uResolution.y;
gl_PointSize *= (1.0 / -viewPosition.z);
}varying vec3 vColor;
void main(){
vec2 uv = gl_PointCoord;
float d = length(uv - vec2(0.5));
if(d > 0.5)
discard;
gl_FragColor = vec4(vColor, 1.0);
// #include <colorspace_fragment>
}
頂点が一緒に動くのでランダム性を追加する
そのために必要な属性(aIntensityとaAngle)をgeometryに追加
const geometry = new THREE.PlaneGeometry(1, 1, 128, 128)

//属性(≈)を追加
const intensitiesArray = new Float32Array(geometry.attributes.position.count)
const anglesArray = new Float32Array(geometry.attributes.position.count)
for(let i = 0; i <geometry.attributes.position.count; i++){
    intensitiesArray[i] = Math.random()
    anglesArray[i] = Math.random() * Math.PI * 2
}
geometry.setAttribute('aIntensity', new THREE.BufferAttribute(intensitiesArray, 1))
geometry.setAttribute('aAngle', new THREE.BufferAttribute(anglesArray, 1))
attribute float aIntensity;
attribute float aAngle;
uniform vec2 uResolution;
uniform sampler2D uTexture;
uniform sampler2D uCanvasTexture;
varying vec3 vColor;
void main() {
vec3 newPosition = position;
//キャンバステクスチャの強度
float i = texture(uCanvasTexture, uv).r ;
//キャンバスに残る残像を無視するため(0.1以下を無視する)
i = smoothstep(0.1, 1.0, i);
i *= 0.2 * aIntensity;
vec3 pos = vec3(
cos(aAngle),
sin(aAngle),
1.0
);
//posの正規化
pos = normalize(pos);
pos *= i;
newPosition += pos;
vec4 modelPosition = modelMatrix * vec4(newPosition, 1.0);
vec4 viewPosition = viewMatrix * modelPosition;
vec4 projectedPosition = projectionMatrix * viewPosition;
gl_Position = projectedPosition;
vec4 textureColor = texture(uTexture, uv);
float intensity = length(textureColor.rgb);
//intensity *= 0.33; //強度の調整(RGBを平均に)
vColor = textureColor.rgb;
gl_PointSize = 0.01 * intensity * uResolution.y;
gl_PointSize *= (1.0 / -viewPosition.z);
}
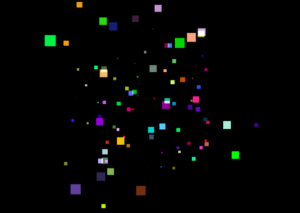
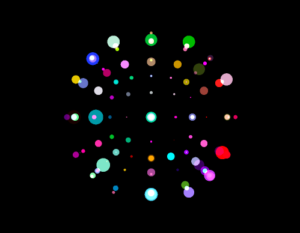
3D空間のパーティクル(BufferGeometry)
セットアップ
BufferGeometryを作成し、100 個のパーティクルの位置、色、サイズ(スケール)をランダムに生成して設定
import * as THREE from 'three'
import vertexShader from './vertex.glsl'
import fragmentShader from './fragment.glsl'
import { OrbitControls } from 'three/examples/jsm/controls/OrbitControls.js'

const canvas = document.querySelector('.webgl')
const sizes = {
    width: window.innerWidth,
    height: window.innerHeight,
    pixelRatio : Math.min(window.devicePixelRatio, 2)// デバイスのピクセル比を取得し、最大でも2に制限
}
sizes.resolution = new THREE.Vector2(sizes.width*sizes.pixelRatio, sizes.height*sizes.pixelRatio)

const scene = new THREE.Scene()
const renderer = new THREE.WebGLRenderer({
    canvas: canvas
})
renderer.setSize(sizes.width, sizes.height)
renderer.setPixelRatio(sizes.pixelRatio)

//ジオメトリ
const geometry = new THREE.BufferGeometry();

//BufferGeometryの属性
const count = 100;
const positions = new Float32Array(count * 3);//位置データ vec3
const colors = new Float32Array(count * 3); // 色データ  vec3
const scales = new Float32Array(count * 1);// ランダムなサイズ float
for(let i = 0; i < count; i++){
        const i3 = i * 3
        positions[i3    ] = Math.random()-0.5  //-0.5から0.5に配置
        positions[i3 + 1] = Math.random()-0.5
        positions[i3 + 2] = Math.random()-0.5
        colors[i3    ] = Math.random()
        colors[i3 + 1] = Math.random()
        colors[i3 + 2] = Math.random()
        scales[i] = Math.random(); // スケール
  }
 geometry.setAttribute('position', new THREE.BufferAttribute(positions, 3));//位置データをgeometryに設定
 geometry.setAttribute('color', new THREE.BufferAttribute(colors, 3)); // 色データをgeometryに設定
 geometry.setAttribute('aScale', new THREE.BufferAttribute(scales, 1))

//マテリアル
 const material = new THREE.ShaderMaterial({
     uniforms:{
        uSize: { value: 0.03 },  // パーティクルのサイズ(非常に小さく設定: vertexシェーダーでの計算の都合上)
        uResolution: { value: sizes.resolution }, // 解像度に応じた調整を行うための解像度ベクトル
        uTime: { value: 0 }, // 時間の経過に伴うアニメーション用の時間
     },
    vertexColors: true, // 各パーティクルに色を設定する
    transparent: true, // 透明度を考慮
    depthWrite: false, // 重なった際の描画順序を無視
  //  blending: THREE.AdditiveBlending, // 重なった部分をより明るく見せる
    vertexShader: vertexShader,
    fragmentShader: fragmentShader
})

// パーティクルを作成
 const particles = new THREE.Points(geometry, material);
 scene.add(particles);
 // カメラ
const camera = new THREE.PerspectiveCamera(75, sizes.width / sizes.height, 0.1, 100)
camera.position.set(0,0, 1)
scene.add(camera)

// オービットコントロール
const controls = new OrbitControls(camera, canvas)
controls.enableDamping = true

function handleResize(){
    sizes.width = window.innerWidth
    sizes.height = window.innerHeight
    sizes.pixelRatio = Math.min(window.devicePixelRatio, 2)
    sizes.resolution.set(sizes.width*sizes.pixelRatio, sizes.height*sizes.pixelRatio)
    camera.aspect = sizes.width / sizes.height
    camera.updateProjectionMatrix()
    renderer.setSize(sizes.width, sizes.height)
    renderer.setPixelRatio(sizes.pixelRatio)
}
const clock = new THREE.Clock()
const tick = () =>{
    controls.update()
    const elapsedTime = clock.getElapsedTime()
    material.uniforms.uTime.value = elapsedTime
    renderer.render(scene, camera)
    window.requestAnimationFrame(tick)
}
handleResize()
tick()
window.addEventListener('resize', handleResize)備考:平面上のパーティクルとの違い
シーン内に複数のオブジェクトがあり、それらが重なり合う場合はどのように色を混ぜ合わせるか(ブレンディング)を管理する必要がある
*深度バッファに書き込むと、後から描画された透明なオブジェクトが不透明なオブジェクトによって遮られ、正しくブレンドされない可能性があるため、通常はtransparent:true が設定されている場合depthWrite: false にする
uniform float uTime;
uniform float uSize;
uniform vec2 uResolution;
/*
備考:position、color、normalのような一般的な属性は、
ShaderMaterialを使用する際に頂点シェーダーに自動的に含まれる
aScaleのようなカスタム属性を定義してシェーダーに追加する場合は
頂点シェーダー内でこれらのカスタム属性を明示的に宣言する
*/
attribute float aScale;

varying vec3 vColor;
void main(){
    vec4 modelPosition = modelMatrix * vec4(position, 1.0);
    vec4 viewPosition = viewMatrix * modelPosition;
    vec4 projectedPosition = projectionMatrix * viewPosition;

    gl_Position = projectedPosition;
    /*Size
     ランダムなサイズを実装する場合、aScaleを乗算する
    */
    gl_PointSize = uSize * aScale* uResolution.y;
    /*
    sizeAttenuation(カメラからの距離に応じてどのように変化するかを制御))の実装
    */
    gl_PointSize *= 1.0 / - viewPosition.z;
    //vColorに色情報代入
    vColor = color;
}
varying vec3 vColor;
/*
gl_PointCoord
フラグメントシェーダー内でのみ利用可能で
レンダリングされる各ポイント(パーティクル)のフラグメントに対して、
そのポイントの中での相対的な位置を(0,0)から(1,1)の範囲で表す
*/
void main(){
gl_FragColor = vec4(vColor, 1.0);
//gl_FragColor = vec4(gl_PointCoord, 1.0, 1.0);;
}
パーティクルの形状
円形
   //円盤状
   float strength = distance(gl_PointCoord, vec2(0.5));
   strength = step(0.5, strength);
   strength = 1.0 - strength;

    // 拡散点
    // float strength = distance(gl_PointCoord, vec2(0.5));
    // strength = 1.0 - strength;

    //光点
   //float strength = distance(gl_PointCoord, vec2(0.5));
   // strength = 1.0 - strength;
   // strength = pow(strength, 20.0);


   //頂点の色を混合して最終的な色を生成
    vec3 color = mix(vec3(0.0), vColor, strength);
    gl_FragColor = vec4(color, 1.0);
パーティクルの配置
*オービットコントロールを有効にすると確認しやすい
備考
ここでは、キューブ状と球体状に配置する場合の例
複雑な場合は3Dジオメトリやモデルから頂点データを取得して作成したBufferGeometryの頂点をTHREE.Points を使って描画するといい
https://koro-koro.com/threejs-shader-3d/#chapter-9
ランダムで配置される位置の調整
Math.random() が 0 から 1 の値を生成するので -0.5 して -0.5 から +0.5 の範囲にしている
*2 にすれば -1 から +1 の範囲になるので、この辺りを調整する
  positions[i3    ] = (Math.random()-0.5) * 2
  positions[i3 + 1] = Math.random()-0.5
  positions[i3 + 2] = Math.random()-0.5
規則性のある配置(グリッド配置)
//BufferGeometryの属性
const count = 300; // パーティクルの数(立方数であることを想定)
const positions = [];
const colors = [];
const scales = [];
const gridSize = Math.cbrt(count); // 立方数に対応するサイズ
const spacing = 1.0; // パーティクル間の間隔
for (let x = 0; x < gridSize; x++) {
    for (let y = 0; y < gridSize; y++) {
        for (let z = 0; z < gridSize; z++) {
            const xPos = (x / (gridSize - 1)) * spacing - spacing / 2;
            const yPos = (y / (gridSize - 1)) * spacing - spacing / 2;
            const zPos = (z / (gridSize - 1)) * spacing - spacing / 2;
            ///特定の範囲(この場合は x と y が -0.2 から 0.2 の範囲)にパーティクルを配置しないようにする場合はここに条件
           // if (Math.abs(xPos) > 0.2 || Math.abs(yPos) > 0.2) {
                positions.push(xPos, yPos, zPos);
                colors.push(Math.random(), Math.random(), Math.random()); // colors 配列にランダムな色を追加
                scales.push(Math.random());
          //  }
        }
    }
}
// 最終的な Float32Array に変換
const finalPositions = new Float32Array(positions);
const finalColors = new Float32Array(colors);
const finalScales = new Float32Array(scales);

geometry.setAttribute('position', new THREE.BufferAttribute(finalPositions, 3));
geometry.setAttribute('color', new THREE.BufferAttribute(finalColors, 3));
geometry.setAttribute('aScale', new THREE.BufferAttribute(finalScales, 1));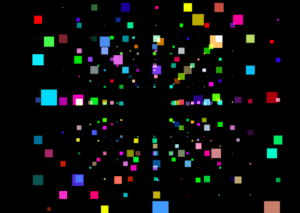
球体上にランダムに配置する
*THREE.Spherical(radius,phi,theta) :3D空間におけるオブジェクトの位置を球面座標系で扱うためのクラス
radius:原点からの距離
phi:Y軸からの角度、0からπ(180度)の範囲で、phiが0:Y軸の正・phiがπ:Y軸の負
theta:X軸に対する角度、0から2π(360度)の範囲で、thetaが0:点はX軸の正・thetaがπ(180度):X軸の負
球面座標系で得られる点の位置はそのままではThree.jsの空間内に配置できないので直交座標系に変換する
const count = 300;
const positions = new Float32Array(count * 3);
const colors = new Float32Array(count * 3);
const scales = new Float32Array(count * 1);
for(let i = 0; i < count; i++){
    const i3 = i * 3;
  // ランダムな球面座標を生成
    const spherical = new THREE.Spherical(
        0.5,
        Math.random() * Math.PI,
        Math.random() * Math.PI * 2
     )
  // 球面座標を直交座標に変換
    const position = new THREE.Vector3()
    position.setFromSpherical(spherical)
  // 変換された直交座標を配列に格納
    positions[i3    ] = position.x
    positions[i3 + 1] = position.y
    positions[i3 + 2] = position.z

    colors[i3    ] = Math.random()
    colors[i3 + 1] = Math.random()
    colors[i3 + 2] = Math.random()

    scales[i] = Math.random();
}

geometry.setAttribute('position', new THREE.BufferAttribute(positions, 3));
geometry.setAttribute('color', new THREE.BufferAttribute(colors, 3));
geometry.setAttribute('aScale', new THREE.BufferAttribute(scales, 1))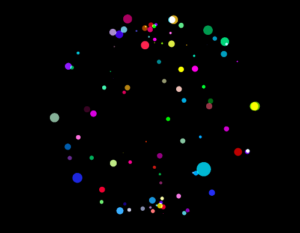
備考 2つは同じことをしている
//球面座標(radius、phi、theta)を直交座標(x、y、z)に変換するための数式
const x = radius * Math.sin(theta) * Math.cos(phi);
const y = radius * Math.cos(theta);
const z = radius * Math.sin(theta) * Math.sin(phi);
const spherical = new THREE.Spherical(radius, phi, theta);
const position = new THREE.Vector3();
position.setFromSpherical(spherical);
const x = position.x;
const y = position.y;
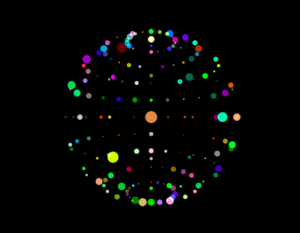
const z = position.z; 球体状に規則性のある配置をする
*緯度経度グリッドに基づく配置
//geometryの属性
const latSegments = 10; // 緯度の分割数
const lonSegments = 20; // 経度の分割数
const radius = 0.5;
const positions = new Float32Array(latSegments * lonSegments * 3);
const colors = new Float32Array(latSegments * lonSegments * 3);
const scales = new Float32Array(latSegments * lonSegments * 1);

let positionIndex = 0;
let colorIndex = 0;
let scaleIndex = 0;

for (let i = 0; i < latSegments; i++) {  // 修正: i < latSegments
    const phi = (i / latSegments) * Math.PI; // 仰角 φ

    for (let j = 0; j < lonSegments; j++) {
        const theta = (j / lonSegments) * 2 * Math.PI; // 方位角 θ

        // 球面座標を定義
        const spherical = new THREE.Spherical(radius, phi, theta);
        // 直交座標に変換
        const position = new THREE.Vector3();
        position.setFromSpherical(spherical);

        // 配列に座標を格納
        positions[positionIndex++] = position.x;
        positions[positionIndex++] = position.y;
        positions[positionIndex++] = position.z;

        // ランダムな色を設定
        colors[colorIndex++] = Math.random();
        colors[colorIndex++] = Math.random();
        colors[colorIndex++] = Math.random();

        // ランダムなスケールを設定
        scales[scaleIndex++] = Math.random();
    }
}

geometry.setAttribute('position', new THREE.BufferAttribute(positions, 3));
geometry.setAttribute('color', new THREE.BufferAttribute(colors, 3));
geometry.setAttribute('aScale', new THREE.BufferAttribute(scales, 1));
球体状に規則性のある配置をする
*フィボナッチ球
//geometryの属性
const count = 100;
const positions = new Float32Array(count * 3);
const colors = new Float32Array(count * 3);  // color属性用
const scales = new Float32Array(count);      // scale属性用
const radius = 0.5;
const goldenRatio = (1 + Math.sqrt(5)) / 2; // 黄金比

for (let i = 0; i < count; i++) {
    // 球面座標の計算
    const theta = 2 * Math.PI * i / goldenRatio; // 方位角
    const phi = Math.acos(1 - 2 * (i + 0.5) / count); // 仰角

    const x = radius * Math.sin(phi) * Math.cos(theta);
    const y = radius * Math.cos(phi);
    const z = radius * Math.sin(phi) * Math.sin(theta);

    // 位置を格納
    positions[i * 3    ] = x;
    positions[i * 3 + 1] = y;
    positions[i * 3 + 2] = z;

    // 色をランダムに格納
    colors[i * 3    ] = Math.random();
    colors[i * 3 + 1] = Math.random();
    colors[i * 3 + 2] = Math.random();

    // スケールをランダムに設定
    scales[i] = Math.random()
}

// geometryに属性を追加
geometry.setAttribute('position', new THREE.Float32BufferAttribute(positions, 3));
geometry.setAttribute('color', new THREE.Float32BufferAttribute(colors, 3));
geometry.setAttribute('aScale', new THREE.Float32BufferAttribute(scales, 1));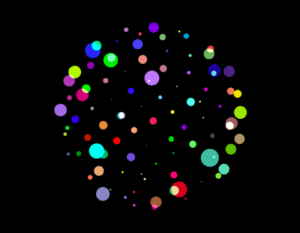
球体状に規則性のある配置をする
*立方体から球体への投影
//geometryの属性
const cubeSize = 5; // 立方体の各辺の分割数
const radius = 0.5;
const positionsArray = [];
const colorsArray = []; // 色の配列
const scalesArray = []; // スケールの配列

for (let x = 0; x < cubeSize; x++) {
    for (let y = 0; y < cubeSize; y++) {
        for (let z = 0; z < cubeSize; z++) {
            // -1.0 から 1.0 の範囲にマッピング
            const nx = (x / (cubeSize - 1)) * 2 - 1;
            const ny = (y / (cubeSize - 1)) * 2 - 1;
            const nz = (z / (cubeSize - 1)) * 2 - 1;
            // 単位ベクトルに正規化して球に投影
            const length = Math.sqrt(nx * nx + ny * ny + nz * nz);

            if (length > 0) {
                const px = (nx / length) * radius;
                const py = (ny / length) * radius;
                const pz = (nz / length) * radius;
                positionsArray.push(px, py, pz);
            } else {
                // 長さが0の場合は球の中心に位置することを意味するため
                positionsArray.push(0, 0, 0);
            }

            // ランダムな色
            colorsArray.push(Math.random(), Math.random(), Math.random());

            // ランダムなスケール
            scalesArray.push(Math.random());
        }
    }
}
// geometryにposition, color, scale属性を設定
geometry.setAttribute('position', new THREE.Float32BufferAttribute(positionsArray, 3));
geometry.setAttribute('color', new THREE.Float32BufferAttribute(colorsArray, 3));
geometry.setAttribute('aScale', new THREE.Float32BufferAttribute(scalesArray, 1));
複数のパーティクルグループを作成して、それぞれをcanvasに配置したい場合など
パーティクルグループを作成する関数を作成して、それぞれのpositionを指定できるようにする
let material, geometry, particles
function createParticles(count, position, size) {
    // ジオメトリ
    const geometry = new THREE.BufferGeometry();

    // パーティクルの位置データと色データを準備
    const positions = new Float32Array(count * 3); // 各パーティクルのx, y, z座標
    const colors = new Float32Array(count * 3); // 各パーティクルのR, G, B値

    for (let i = 0; i < count; i++) {
        const i3 = i * 3;
        // ランダムにパーティクルの位置を設定(仮にランダム範囲を設定)
        positions[i3] = (Math.random() - 0.5) * 10;
        positions[i3 + 1] = (Math.random() - 0.5) * 10;
        positions[i3 + 2] = (Math.random() - 0.5) * 10;

        // ランダムに色を設定
        colors[i3] = Math.random(); // R
        colors[i3 + 1] = Math.random(); // G
        colors[i3 + 2] = Math.random(); // B
    }

    // BufferGeometryに属性を追加
    geometry.setAttribute('position', new THREE.BufferAttribute(positions, 3));
    geometry.setAttribute('color', new THREE.BufferAttribute(colors, 3));

    // マテリアル
    material = new THREE.ShaderMaterial({
        uniforms: {
            uSize: { value: size }, // パーティクルのサイズ
            uResolution: { value: sizes.resolution }, // 解像度に応じた調整
            uTime: { value: 0 }, // 時間の経過を制御
            uProgress: { value: 0 } // アニメーションの進行度合い
        },
        vertexColors: true, // 各パーティクルに色を設定
        transparent: true, // 透明度を考慮
        depthWrite: false, // 重なった際の描画順序を無視
        blending: THREE.AdditiveBlending, // 加算ブレンド
        vertexShader: vertexShader,
        fragmentShader: fragmentShader
    });

    // パーティクルを作成
    particles = new THREE.Points(geometry, material);
    particles.position.copy(position);
    scene.add(particles);
}

// パーティクルを作成する関数呼び出し
createParticles(100, new THREE.Vector3(), 0.3);
アニメーション
上下のランダムな動き(0から1)
modelPosition.y += sin(uTime+modelPosition.x*100.0)*0.5 +0.5;カメラの視野の前後にランダムに散らばっているパーティクルの位置を時間経過とともに微妙に変化させる
float smallFluctuation = fract(modelPosition.z + uTime * 0.3);
modelPosition.z += smallFluctuation ;
GSAPを利用して、uniform変数をアニメーションさせる
*例ではuProgressというuniformの値を0から1にアニメーションさせる
// ShaderMaterialの作成
const material = new THREE.ShaderMaterial({
  uniforms: {
    uProgress: { value: 0 } // 初期値を0に設定
  },
  vertexShader: vertexShaderCode,
  fragmentShader: fragmentShaderCode
});

// GSAPでアニメーションを設定
    gsap.to(material.uniforms.uProgress, {
        value: 1, // uProgressを1にアニメーション
        duration: 3, // アニメーションの持続時間を2秒に設定
        ease: "linear", // イージング
        onUpdate: () => {
          // アニメーション中に何か処理をしたい場合のコールバック
        },
        onComplete:() => {
            //アニメーション終了後の処理
            //例:Pointsからインスタンスを削除,ジオメトリとマテリアルを破棄
            scene.remove(particles)
            geometry.dispose()
            material.dispose()
        },
      });
//値 x を範囲 [a, b] から新しい範囲 [c, d] に変換する関数
float remap(float x, float a, float b, float c, float d){
return c + (x - a) * (d - c) / (b - a);
}
void main(){
vec3 newPosition = position;
/*
uProgressが0から1まで変化する中で
その最初の0から0.1までの部分を取り出して、その範囲内で0から1のアニメーションを行う
*/
float progress1 = remap(uProgress, 0.0, 0.1, 0.0, 1.0);
progress1 = clamp(progress1,0.0,1.0);
/*
イージング、最初はゆっくり、最後に加速
progress1 = pow(progress1, 3.0);
最初は速く、最後はゆっくり
progress1 = 1.0 - pow(1.0 - progress1, 3.0);
*/
newPosition *= progress1;
vec4 modelPosition = modelMatrix * vec4(newPosition, 1.0);
vec4 viewPosition = viewMatrix * modelPosition;
vec4 projectedPosition = projectionMatrix * viewPosition;
//省略
}全ての粒子が一斉に同じ動きをせず、少しずつ異なるタイミングで動くようようにする
*パーティクルの属性にランダムな時間係数を持たせる
//aTimeMultiplierをランダムに生成

const timeMultipliersArray = new Float32Array(maxCount)

for (let i = 0; i < count; i++) {
  timeMultipliersArray[i] = 1 + Math.random();
}
geometry.setAttribute('aTimeMultiplier', new THREE.Float32BufferAttribute(timeMultipliersArray, 1))
//uProgressにaTimeMultiplierを掛けて、粒子の進行スピードを個別に変更
float progress = uProgress * aTimeMultiplier;備考:gl_PointSizeやprogressの値を使ってサイズを小さくし、最終的にパーティクルを視界から消す処理を行いたい場合はなど
Windowsや一部のGPUではgl_PointSizeが1.0未満になると、その値が自動的に1.0にクランプされるため、パーティクルが小さくても完全に見えなくならず、残ってしまいます
解決策
 // サイズが1.0未満なら、パーティクルを遠くに飛ばす
if(gl_PointSize < 1.0) {
  gl_Position = vec4(9999.9, 9999.9, 9999.9, 1.0);
}